Concrete bird baths are popular because they are sturdy and durable. However, prolonged exposure to harsh sunlight and drastic temperature variations can still cause hairlines cracks in these fixtures.
The good news is: We can still clean and seal the birdbath to prolong its lifespan, as long as you use a non-toxic sealant.
Read on for detailed explanations of how to seal a concrete bird bath.
Table of Contents
Steps to Seal a Concrete Bird Bath
Taking the time to seal your concrete bird bath has many benefits. It makes your fixture more durable, easier to clean and prevents a leaking concrete bird bath.
Step 1: Prepare
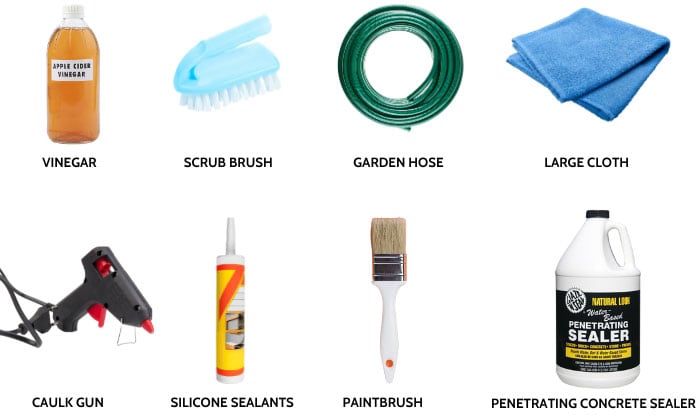
- Vinegar (or bleach/hydrogen peroxide)
- Scrub brush
- Garden hose
- Large cloth or cardboard
- Silicone sealants or concrete crack fillers (optional)
- Caulk gun and flat applicator sticks (optional)
- Penetrating concrete sealer
- Paintbrush
All products used when sealing your birdbath must be non-toxic since birds bathe and drink this water.
Once all your materials are ready, you can start sealing your concrete bird bath.
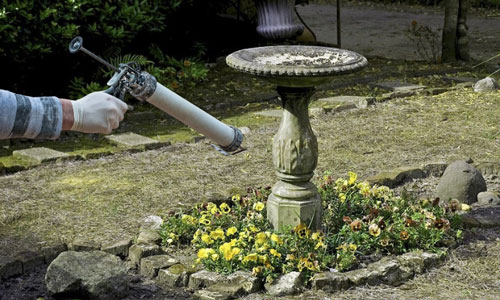
Step 2: Clean the Bath
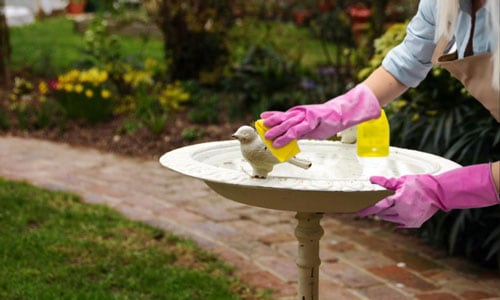
It won’t do you any good to seal all the dirt and debris into your birdbath’s pores. Pour a solution of 4 parts water and 1 part vinegar into the concrete bowl. Let it sit for 15-20 minutes before scrubbing vigorously with a brush.
Should any debris or algae remain, use stronger non-toxic concrete cleaner products, such as mixing 1 gallon of water with ¾ cup of bleach. Another viable alternative is one part hydrogen peroxide with one part water.
Whatever cleaning solution you use, be sure to rinse the bath thoroughly afterward using a garden hose.
Step 3: Dry the Bath Completely
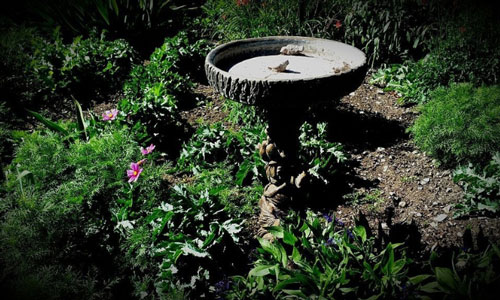
After cleaning your bath, drain all the water and allow the bath to dry thoroughly.
If possible, transfer the bird bath into a shed or garage to prevent leaves and other materials from contaminating it again. Alternatively, you can use a birdbath cover to keep debris out of the fixture.
Cement bird baths take 3-4 days to fully dry, so even if it appears dry, it may still be damp inside. As such, be sure to wait out this duration rather than risk sealing wet concrete, which can lead to further complications, such as the sealant not curing properly.
Step 4: Seal Cracks
Should your bird bath have any cracks, perform bird bath repair and seal them carefully with silicone sealants or concrete crack fillers. For accuracy, I’d suggest applying these sealants using a caulk gun.
Once you have filled the cracks in a concrete birdbath, use your fingers or an item with a flat edge to scrape away the excess sealant for a smooth surface. Wait a day for the sealant to set.
Step 5: Apply Concrete Sealant
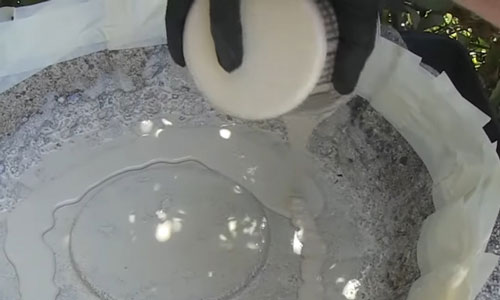
For the safety of your bird visitors, only use non-toxic concrete sealants. Some safe sealers you can use are tung oil, linseed oil, epoxy sealers, or soapwort. Polyurethane is also an acceptable option, although it’s only non-toxic when it’s fully cured.
Keep in mind the following:
- Always lay out a protective cloth or cardboard on the ground first.
- Schedule your application on a warm, sunny day at about 50℉. Never paint while it rains because the excess moisture will affect the process.
- Always follow package instructions.
Once the concrete bird bath sealer is prepared, use a regular paintbrush to generously apply the sealant to the birdbath’s interior.
Depending on the specific product you are using, two or more layers may be required. Note that each layer must dry thoroughly before the next one is applied.
Then, wait another 3-4 days to ensure your waterproof sealer is completely set before re-installing your birdbath.
Conclusion
How to seal a concrete bird bath is extremely doable, even for first-timers.
Though it may take several days and some elbow grease, the activity will not only keep your birds safe and hydrated, but it will also leave you with a profound sense of fulfillment.
A properly sealed bird bath will also make cleaning and maintenance easier and cheaper in the long run, and that’s always a welcome benefit!

George and I became friends after a birdwatching trip with our new group. And we have been enjoying every adventure together. When he told me the idea of establishing a site that shares our experiences and fun, I immediately agreed. After trials and errors, here we have Thayerbirding.